
There are countless ways to back up data on the Linux platform. One of the more tried and true methods is by using the rsync tool. Rsync is a remote file copying tool that can be used on its own or from within your very own bash scripts. Rysnc is used by a number of GUI front ends and gives every Linux admin plenty of flexibility to do just about any type of back up you need.
I want to walk you through the basics of setting up rysnc to do what it was intended to do–back up a local directory to a remote host. The setup is simple and effective.
SEE: 10 free alternatives to Microsoft Word and Excel (TechRepublic download)
What you’ll need
All you’ll need to make this work is:
- Two Linux servers (one as a source and one as a destination)
- A user account with sudo privileges
I’ll be demonstrating on Ubuntu Server 18.04 (for both source and destination). Rsync is available for most every Linux distribution and can be installed from the standard repositories.
With those bits at the ready, let’s make this work.
How to install rsync
On the off-chance rsync isn’t installed on your system(s), it can be installed with the following command:
sudo apt-get install rsync -y
Once installed (on both source and destination hosts), make sure to start and enable the service with the commands:
sudo systemctl start rsync

sudo systemctl enable rsync
That’s it for the installation.
How to configure the destination server
The first thing we’ll do is configure the destination server. On this server issue the command:
sudo nano /etc/rsyncd.conf
In that file, paste the following:
[backup]

path=DESTINATION_DIRECTORY

hosts allow = SOURCE_IP

hosts deny = *

list = true

uid = root

gid = root

read only = false
Where:
- DESTINATION_DIRECTORY is the directory on the destination server that will house the backup.
- SOURCE_IP is the IP address of the source server.
Save and close that file. Restart the rsync service with the command:
sudo systemctl restart rsync
How to run rsync
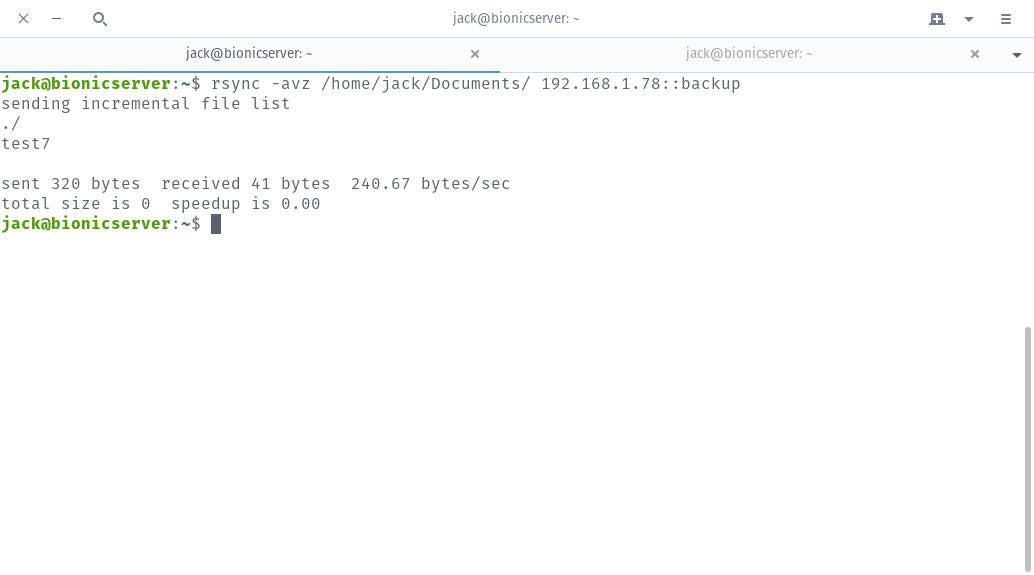
Now we’re going to run a test of the rsync command on the source server. Log in to that server and issue the command:
rsync -avz SOURCE_DIRECTORY DESTINATION_IP::backup
Where:
- SOURCE_DIRECTORY is the directory to be backed up.
- DESTINATION_IP is the IP address of the destination server.
Rsync should report back to you that it has successfully backed up the files/folders from the source to the destination (Figure A).
Figure A
How to set up a cronjob
Since rsync does not have a built-in tool for automating the backup process, we need to make use of cron to set this up. In order to successfully make this work, we must create a simple bash script that holds the rsync command. To do that, issue the command:
nano rsync
In that file, paste the following:
rsync -avz SOURCE_DIRECTORY DESTINATION_IP::backup
Where:
- SOURCE_DIRECTORY is the directory to be backed up.
- DESTINATION_IP is the IP address of the destination server.
Save and close that file. Give the new file the proper permissions with the command:
chmod u+x rsync
Now we can create a cron job. For this, issue the command:
crontab -e
In the crontab file, add the following to the bottom:
00 01 * * * PATH_TO_RSYNC_FILE/rsync
Where PATH_TO_RSYNC_FILE is the path housing the rsync script.
The above cronjob will run the script at 1 AM daily. You can change that to whatever time you need (in accordance to the crontab time definitions).
The cronjob will run at the chosen time and your data sent to the destination server.
Congratulations, you’ve just created a simple back up solution from one Linux server to another.

Image: Jack Wallen
